Step 1: Locate and activate the display.
- Find the meter box.This is typically in your front yard on the county right of way.
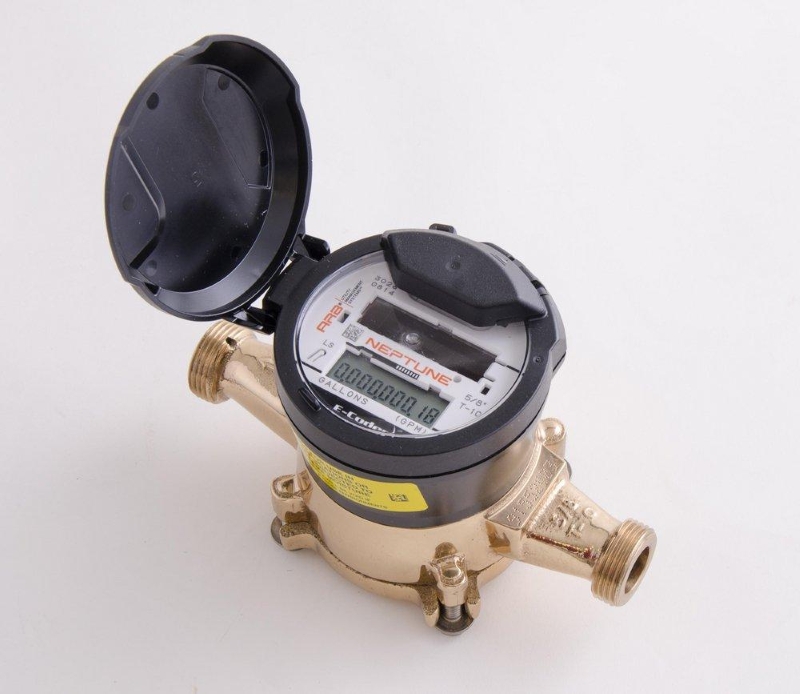
- Open the cover.Remove the lid of the meter box. Open the cover to see the face of the meter.
- Shine a flashlight.On the meter face, locate the small, circular photoelectric eye (often marked with a flashlight symbol). Shine a standard flashlight or your phone's flashlight over the sensor for a few seconds.
Step 2: Read the cumulative total.
- Wait for the display to cycle.The meter will show a series of screens before alternating between two main displays.
- Identify the "Reading" screen.One of the repeating screens shows your total water usage since the meter was installed, which is the number used for billing.
- Read the full number.Read the digits from left to right, including the decimal point. Depending on the meter model, this number is in gallons.
Step 3: Use the rate of flow for leak detection.
- Identify the "Rate" screen.The meter second main display shows the current water flow rate in gallons. You may see “FR” or faucet symbol.
- Turn off all water.Make sure all faucets, toilets, and water-using appliances are off.
- Check the flow indicator.If the meter still shows a flow rate greater than zero (0.0), it indicates that water is moving through the meter, and you likely have a leak somewhere in your system.
- Solid icon:Indicates a continuous leak (constant flow over the last 24 hours).
- Flashing icon:Indicates an intermittent leak (water was flowing for at least 50% of the last 24 hours).
Step 4: Finish and close the meter.
- After finishing, close the lid and put meter lid in place on box. This will allow the display to turn off and preserve the meter's battery life.